Maven项目及常用的依赖配置
前言
这里我会简单介绍三种最常见Spring boot的新建方式
Spring官方新建Spring Boot项目
进入页面,编辑好项目配置,点击确认,生成spring Boot项目,在IDE编译器中通过maven方式导入项目

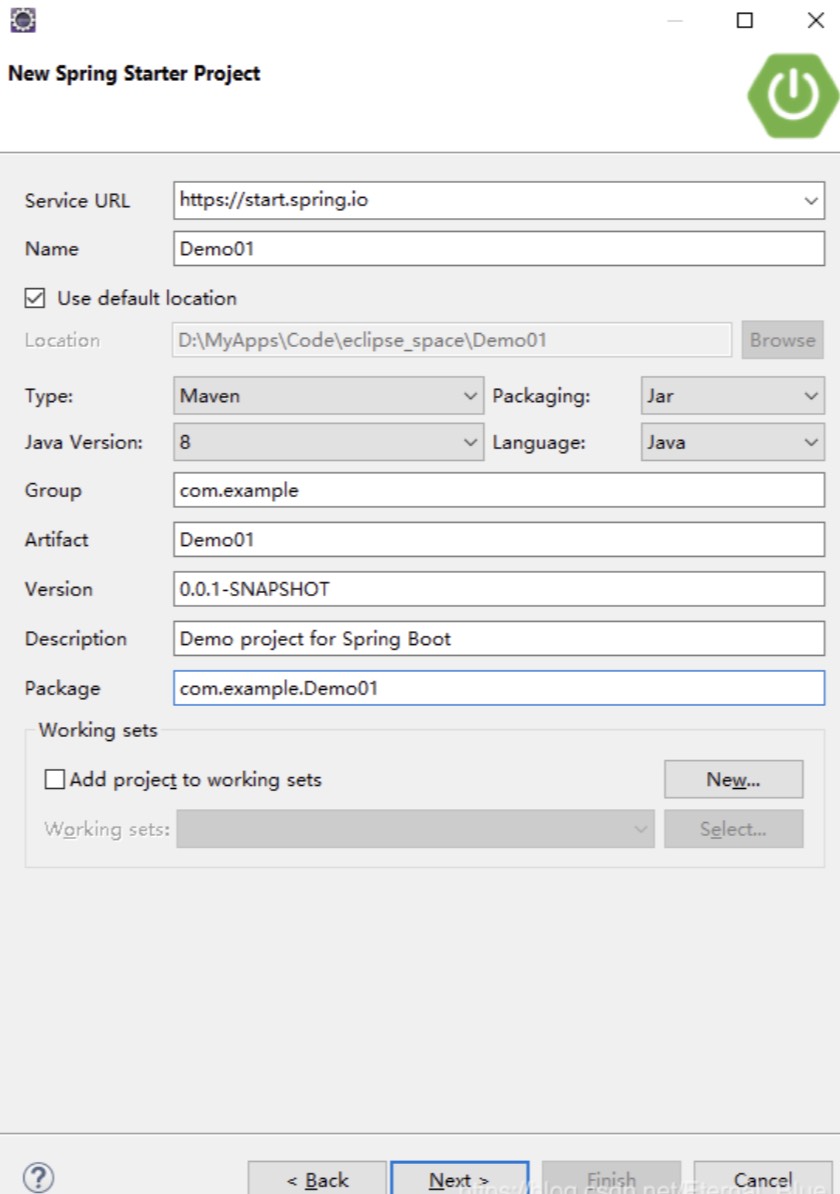
Eclipse编译器新建Spring Boot项目
官方下载的Eclipse只是个空架子,缺少各种插件,当然也缺少创建Spring Boot项目的插件
这时候就需要手动下载插件Help - Eclipse- Marketplace.. 搜Spring,下载Spring Tools...
我这里下载过了,就不演示了

下载完后,重启Eclipse编译器
重启后
File —-> New —-> other —-> Spring Boot —-> Spring Starter Project然后各种下一步下一步。。。。后面maven依赖的话按照需求进行萱选择,我会在文章后面讲哪些依赖是常用的
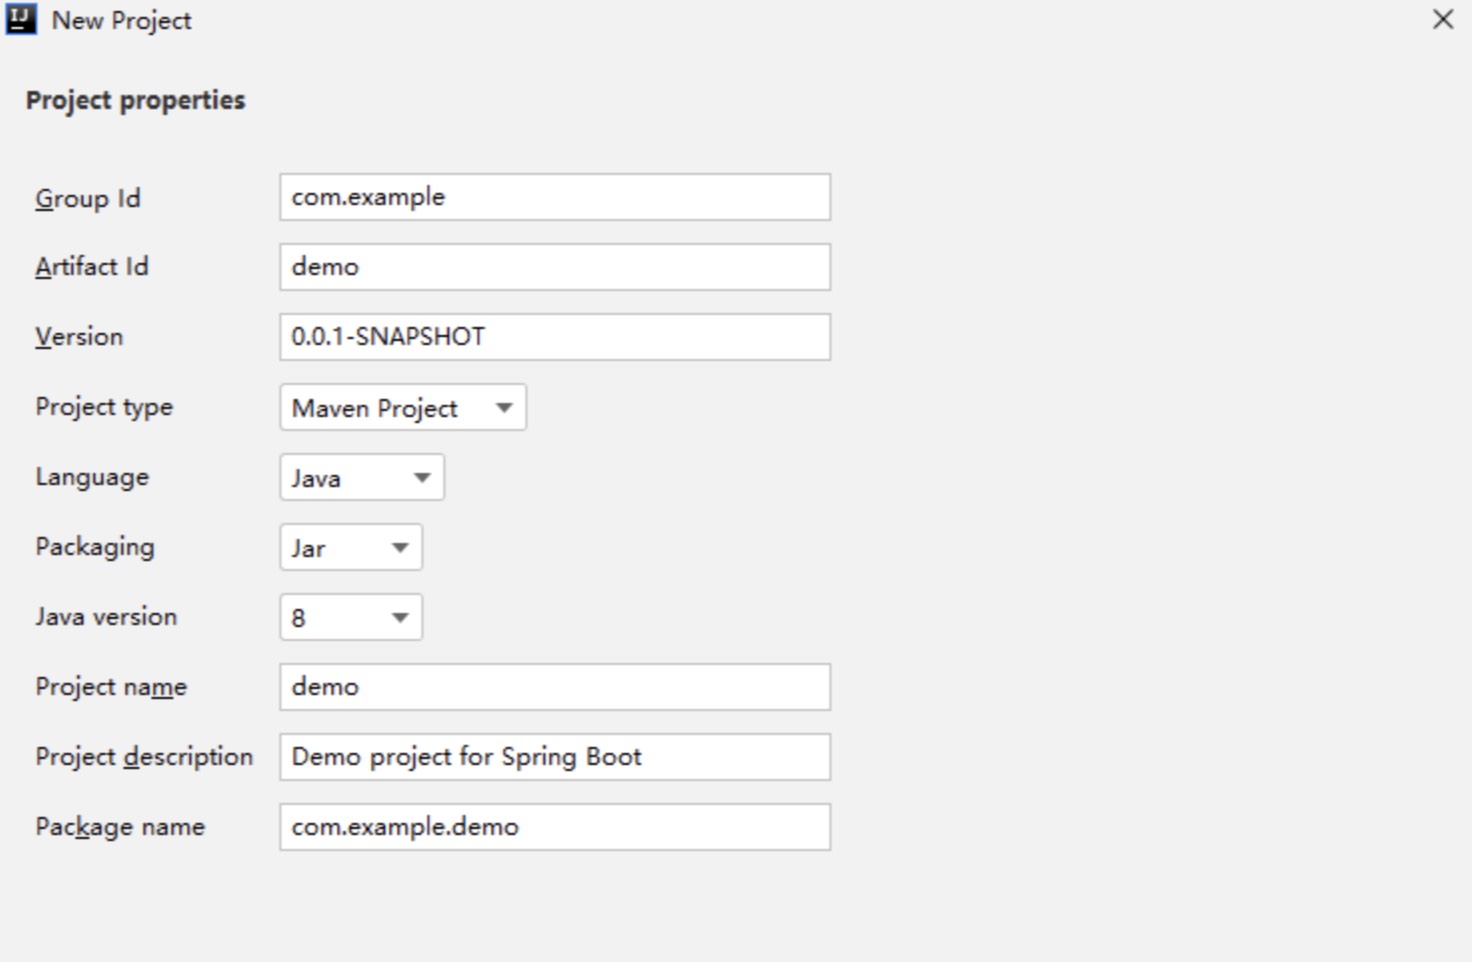
Idea编译器新建Spring Boot项目
我用的是社区版的免费idea,我就喜欢白嫖~~File —-> Settings —-> Plugins
搜Spring Assistant,然后下载,下载完成,重启idea编译器

创建项目File —-> New —-> Project —-> Spring Assistant
下一步下一步….配置页面都是一样的,看看上面官方创建项目的配置方式就明白了了

各种需要的依赖
项目建好后,就需要引入各种需要的依赖了,我在这里简单说一下常用的几种依赖
Spring Boot核心启动器
SpringBoot核心启动器,包含各种springboot的配置日志等,创建项目时会自动引入该依赖
注解@controller、@Service、@Component、@Resource 是spring的,所以spring boot创建完成后就可以使用
1 | <dependency> |
junit测试
junit测试,创建项目时会自动引入该依赖
1 | <dependency> |
可执行的 Web 应用
支持注解:@RestController、@RequestMapping、@ResponseBody、@JsonFormat
1 | <dependency> |
thymeleaf 页面模板技术
SpringBoot支持的thymeleaf页面模板技术,thymeleaf支持 th:text 规则
默认存放模板页面的路径在src/main/resources/templates 或者 src/main/view/templates
默认的页面文件后缀是.html
1 | <!-- thymeleaf --> |
mysql数据配置
配置mysql依赖时,不写版本号
SpringBoot2.1.x以后默认使用的是mysql 8版本,
SpringBoot2.1.x之前默认使用的是mysql 5.x版本
在配置数据源的时候,就有差异了
配置低版本 5.xx.xx:
spring.datasource.driver-class-name=com.mysql.jdbc.Driver
spring.datasource.url=jdbc:mysql://localhost:3306/student?useUnicode=true&characterEncoding=UTF-8&useSSL=false
spring.datasource.username=root
spring.datasource.password=123456
配置高版本 8.xx.xx:
spring.datasource.driver-class-name=com.mysql.cj.jdbc.Driver
spring.datasource.url=jdbc:mysql://localhost:3306/student?serverTimezone=GMT%2B8&useUnicode=true&characterEncoding=UTF-8&useSSL=false
spring.datasource.username=root
spring.datasource.password=123456
1 | <dependency> |
mybatis
数据处理层持久层框架,连接数据库
着重点放在了编写sql上,而不是通过jdbc传统方式来不断操作Connection、Statment、ResultSet
注解@Mapper 指定映射接口
application.properties配置文件中配置自动识别的xml:
mybatis.mapperLocations=classpath:mapper/*Mapper.xml
mybatis.type-aliases-package=com.smart.demo.entity
1 | <dependency> |
mybatis-plus
在mybatis基础上的升级版工具,避免了使用mybatis时需要编写大量的xml文件
1 | <dependency> |
Spring Boot热部署
修改java代码后,不用重启项目就能直接最新测试,省略了不断修改代码不断重启项目的麻烦
1 | <dependency> |
Json格式转换工具Fastjson
Fastjson 是一个 Java 库,可以将 Java 对象转换为 JSON 格式,当然它也可以将 JSON 字符串转换为 Java 对象。
分享篇自己写的 fastjson 的例子:【Java中Json、String、jsonObject、jsonArray格式之间互相转换】
1 | <dependency> |
lombook
lombok最优秀的就是注解了,一个注解就干掉了很多代码
实体类中的注解.
@Data :直接可以省略了Get、Set方法
@Slf4j :不需要单独引入日志依赖和配置日志,直接 log.info( ) 打印日志
如何在IDE编译器 中使用lombok插件??
idea中可以直接在编译器中搜索下载,就不多阐述了
eclipse则需要从官网下载lombok.jar包,然后双击启动jar包,逐步操作,指向eclisp.exe,重启eclipse即可
1 | <dependency> |
待更新….
 微信
微信 支付宝
支付宝