BLOG导航栏中加入天气插件,显示实时天气
知心天气
点击进入 知心天气 官网
注册帐号
进入知心天气官网,注册账号,申请免费版产品服务
申请插件
打开知心天气插件,申请免费使用(配置上第2步中申请的免费产品和公钥)
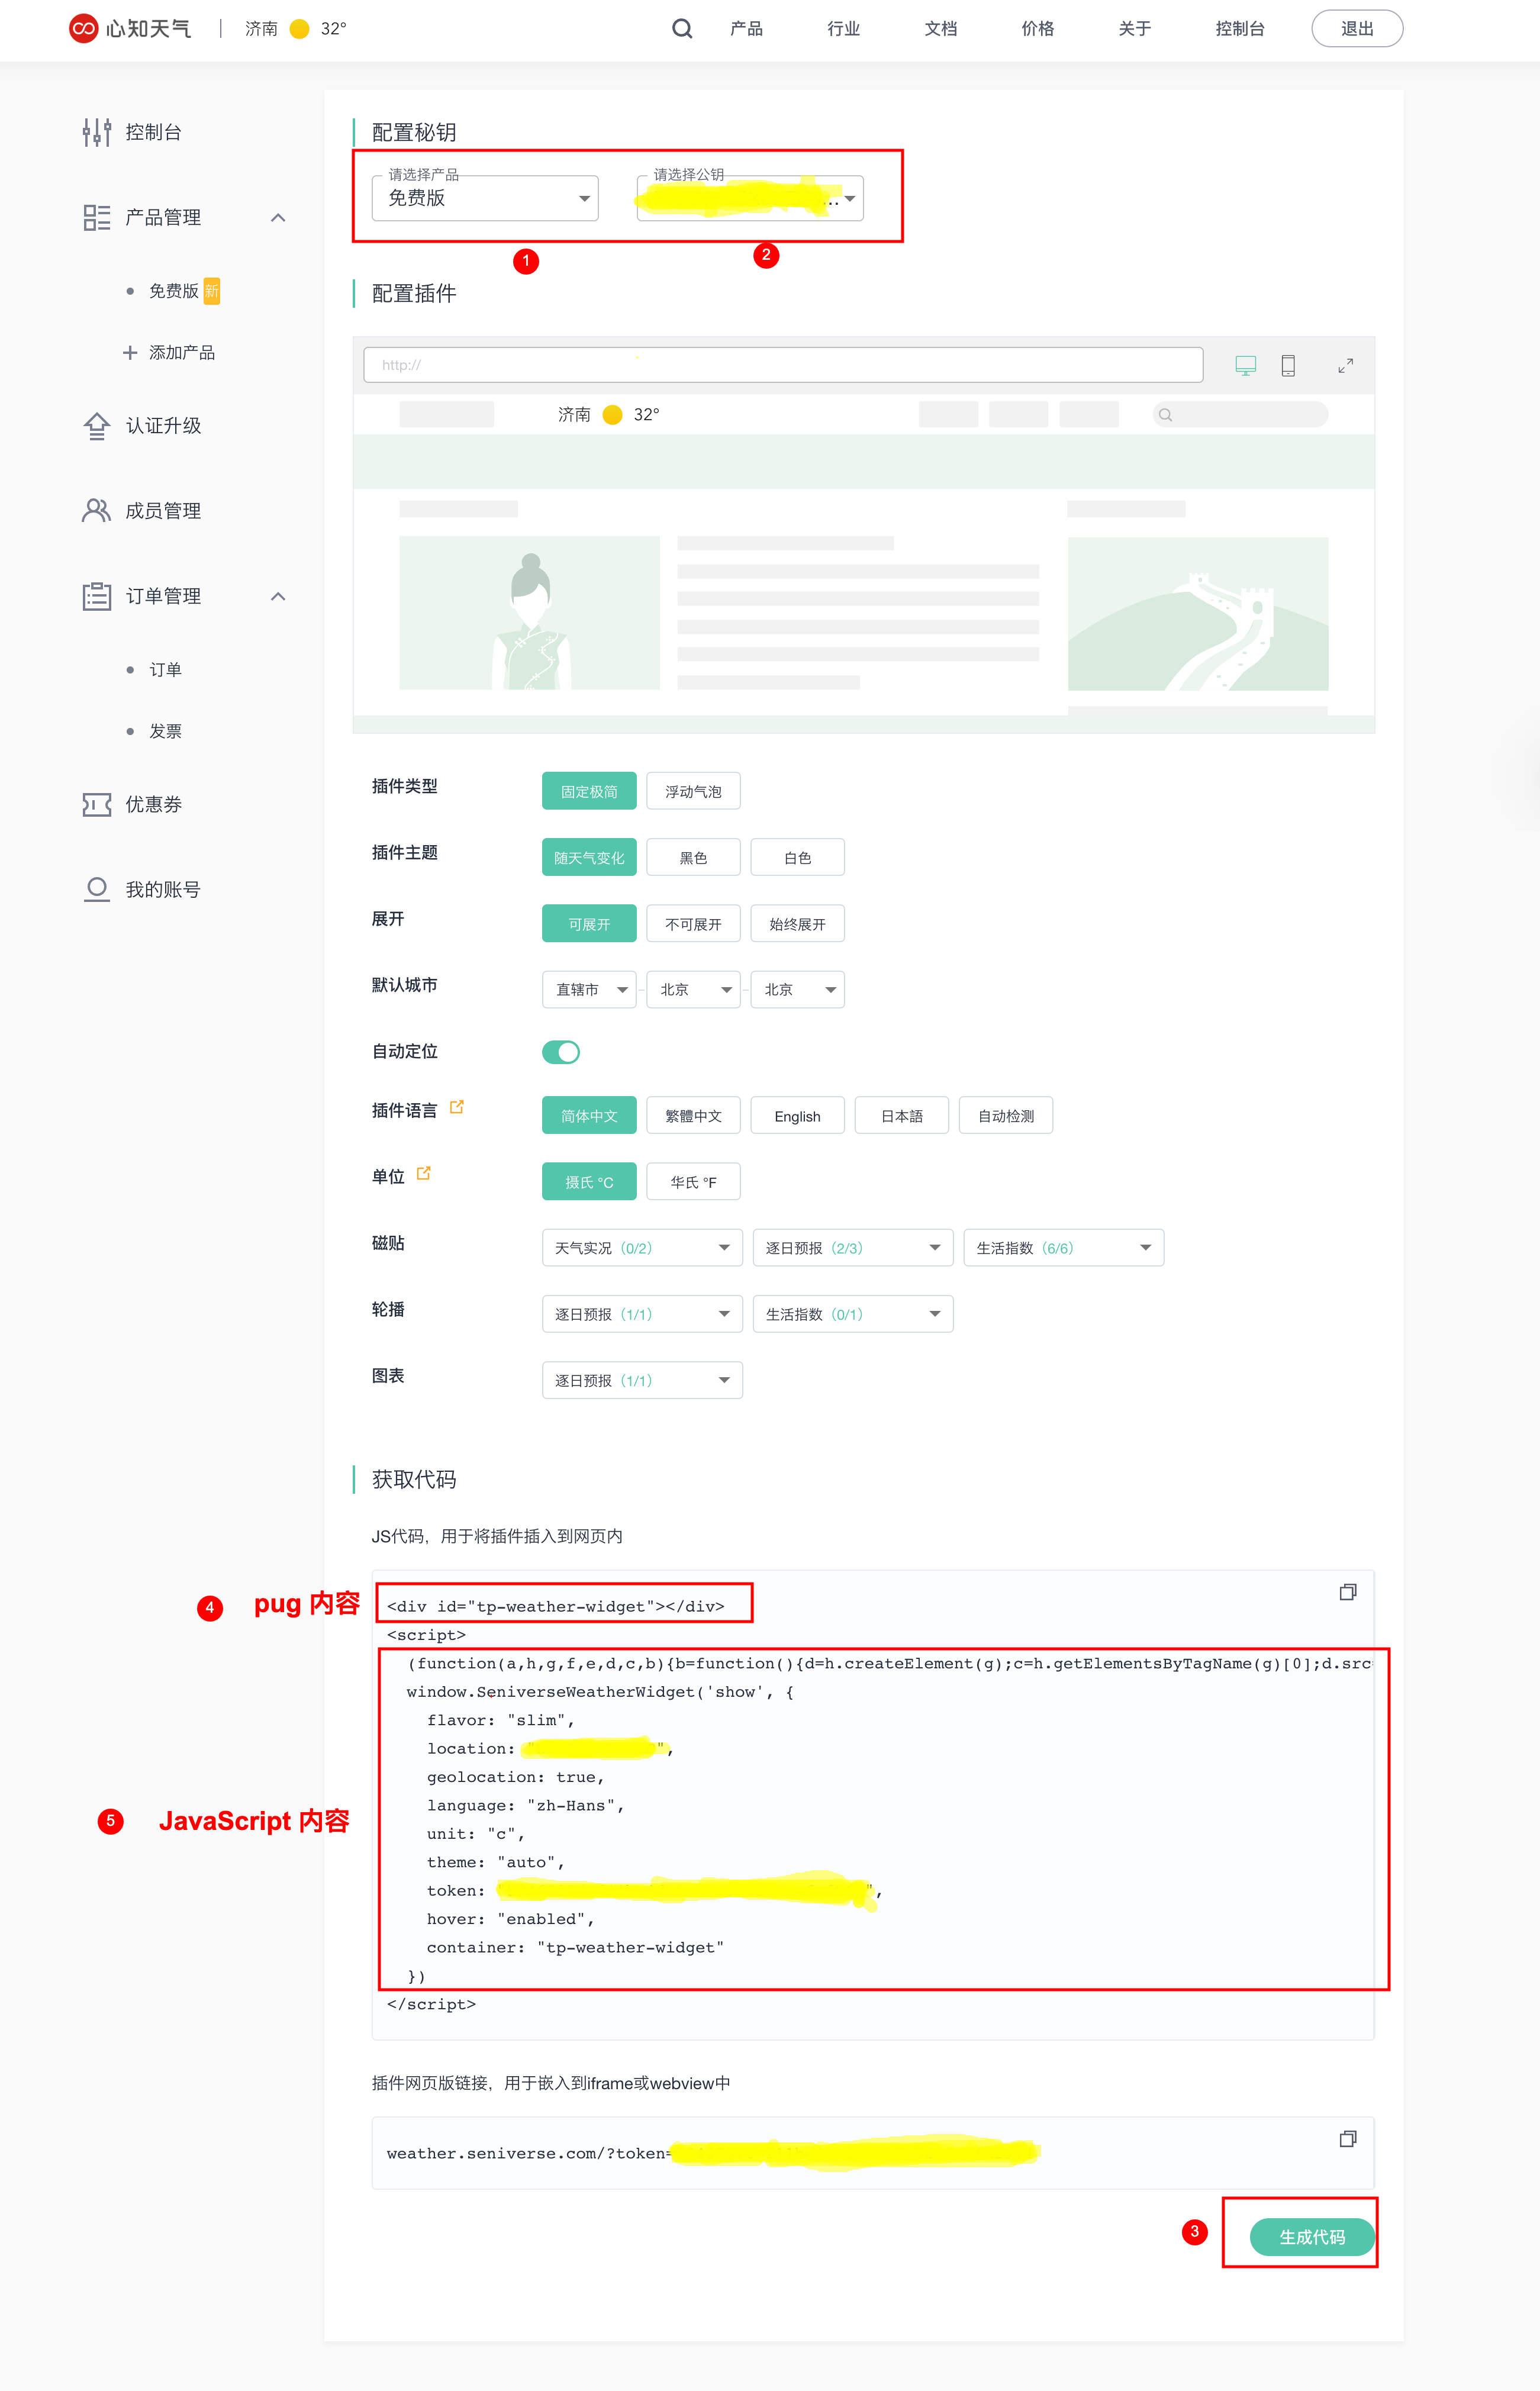
配置JavaScript
在hexo-blog-demo/node_modules/hexo-theme-butterfly/layout/source/js/路径下新建一个weather.js
注意:复制代码官网生成的代码的时候,不要将<script></script>标签也复制上!!
1
2
3
4
5
6
7
8
9
10
11
12(function(a,h,g,f,e,d,c,b){b=function(){d=h.createElement(g);c=h.getElementsByTagName(g)[0];d.src=e;d.charset="utf-8";d.async=1;c.parentNode.insertBefore(d,c)};a["SeniverseWeatherWidgetObject"]=f;a[f]||(a[f]=function(){(a[f].q=a[f].q||[]).push(arguments)});a[f].l=+new Date();if(a.attachEvent){a.attachEvent("onload",b)}else{a.addEventListener("load",b,false)}}(window,document,"script","SeniverseWeatherWidget","//cdn.sencdn.com/widget2/static/js/bundle.js?t="+parseInt((new Date().getTime() / 100000000).toString(),10)));
window.SeniverseWeatherWidget('show', {
flavor: "slim",
location: "XXXXXXXXXXXX",
geolocation: true,
language: "zh-Hans",
unit: "c",
theme: "auto",
token: "xxxxxxxx-xxxx-xxxx-xxxx-xxxxxxxxxxxx",
hover: "enabled",
container: "tp-weather-widget"
})
配置Pug
新增 hexo-blog-demo/node_modules/hexo-theme-butterfly/layout/includes/header/nav.pug 标签
1
2
3
4
5
6
7
8
9
10
11
12
13
14
15
16
17
18
19
20
nav#nav
span#blog-info
a(href=url_for('/') title=config.title)
if theme.nav.logo
img.site-icon(src=url_for(theme.nav.logo))
if theme.nav.display_title
span.site-name=config.title
+ #weather
+ <div id="tp-weather-widget"></div>
#menus
if (theme.algolia_search.enable || theme.local_search.enable || theme.docsearch.enable)
#search-button
a.site-page.social-icon.search(href="javascript:void(0);")
i.fas.fa-search.fa-fw
span=' '+_p('search.title')
!=partial('includes/header/menu_item', {}, {cache: true})
#toggle-menu
a.site-page(href="javascript:void(0);")
i.fas.fa-bars.fa-fw
修改主题配置
在主题配置文件_config.butterfly.yml添加配置1
2
3
4inject:
bottom:
# 天气显示
- <script defer data-pjax src="/js/weather.js"></script>
重启服务
1
hexo clean & hexo server
和风天气
注册账号
制作插件
进入【和风天气插件官网】创建一个模板,根据自己需求生成代码
在
\themes\butterfly\source\js目录下创建一个weather.js文件,将生成的代码写入1
2
3
4
5
6
7
8
9
10
11
12
13
14
15
16
17
18
19
20
21
22WIDGET = {
"CONFIG": {
"modules": "01234",
"background": "5",
"tmpColor": "FF9900",
"tmpSize": "16",
"cityColor": "CCCCCC",
"citySize": "16",
"aqiColor": "D9D9D9",
"aqiSize": "16",
"weatherIconSize": "24",
"alertIconSize": "18",
"padding": "15px 10px 10px 20px",
"shadow": "0",
"language": "auto",
"borderRadius": "5",
"fixed": "false",
"vertical": "top",
"horizontal": "left",
"key": "***********"
}
}- 在主题配置文件
_config.butterfly.yml添加配置1
2
3
4
5inject:
bottom:
# 天气显示
- <script src="https://widget.qweather.net/simple/static/js/he-simple-common.js?v=2.0"></script>
- <script src="/js/weather.js"></script> - 在
\themes\butterfly\layout\includes\header路径下找到nav.pug文件1
2nav#nav
#he-plugin-simple - 保存配置,重新渲染,就可以看到效果了。
- 上述操作可以将天气组件成功展示在header中间,如果想要调整该组件位置到blog_name旁,可以直接“暴力”修改
weather.js中的padding项(并不推荐)。如果不嫌麻烦,可以在nav.pug文件中添加一个占位组件:1
#none_space
- 然后在
\themes\butterfly\source\css\_layout\head.styl中将#blog_name替换为#none_space - 保存,重新部署